How To Print On Sleeves With A Heat Press | Sleeve Print Sizing, Placement & Positioning
Browse Video Categories
Transfer Application | Artwork & Apparel | Easy View Tutorials | Webinars | Ordering Tips | Business | Heat Presses
Hey Friends, Dave here with Transfer Express, and today we’re talking all about sleeve prints!
From long sleeves to short sleeves, it’s pretty common to see prints on our arms. Maybe not as common as the standard fronts, backs or left chest prints, but they’re quite popular nonetheless, especially if you’re looking to add some subtle, minimal branding on the outside of your tees.
Because we didn't talk about sleeves too much in our perfect print placement video, we figured no better time than now to dive in for the common sizing, placement and even how you can print them with the equipment you have in your shop.
Ready? Let’s get right to it!
The first step in planning your sleeve prints is to size your design accordingly. For short sleeves, it depends what you’re going for - small minimal branding is typically in the 1 to 2 inch range, just like this logo we’re going to print here in just a little bit.
However, if you want to go bigger, we recommend staying within 3 inches or so, depending on the dimensions of the logo.
For long sleeves, you’ve got a lot more real estate for printing, so typically you’ll max your print area out around 3-4” x 17.5”. Of course, you can go as large as your heat press platen, but on some garments you may have trouble with wrinkling on the sleeves, so around that 17.5” length makes it easier to decorate.
The vast majority of sleeve prints are even smaller, around 2-2.5” x 14" or so. It all depends on the look you’re going for.
With sizing covered, let’s turn to placement. It’s always the best to find a point of reference on the garment that you can anchor your print to.
For short sleeves, we’ll go from the cuff seam. I typically recommend about an inch from the seam to the bottom of the graphic. This is a great starting point, but depending on your graphic dimensions, you may need to modify the placement slightly. Just be sure to have enough room from your graphic to keep these seams off of the printing area.
For long sleeves, we’ll still typically anchor our prints from the wrist cuff seams, so the print is on the forearm and up, but if you’re looking to achieve a trendy “floating logo” on a long sleeve, or higher bicep placement, switch to the shoulder or sleeve seam at the top. Now the placement here varies based on the look you’re going for, but you’ll commonly be 2-3 inches from the cuff seam, and 3-4 inches away from the shoulder seam for that bicep print.
Just like I mentioned in the placement video and our sizing t-shirt art video, holding a ruler up to yourself, your friends, family, mannequins or coworkers can help you get spot on placement and you can even use a piece of paper folded to the dimensions of your artwork to get a great idea of how it's going to look.
Now with the basics covered, let’s get to printing! With sleeves, there’s a few different methods we can use to print them, either with our full size heat press here, maybe some specialty platens, or even printing sleeve prints with a cap press.
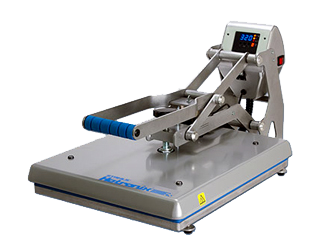
Let’s start with all of the ways to print short sleeves first. Back here at our trusty Hotronix 16" x 20" Auto Open Clamshell press, we can toss our shirt here on the full size lower platen and try to get it as flat as possible for our print location.
There’s just one problem- on the vast majority of short sleeves, theres a seam that runs on the underside of the arm, so that’s definitely going to affect our print quality. We can remedy this with a mousepad- cut down to size, we can fit it inside the sleeve to raise the printing area. Of course we’ll need to adjust our pressure on the press accordingly to compensate for that raised print area. This is a great, economical option in a pinch or if you need just a few shirts, but it’s not really efficient with the amount of time it takes to arrange the shirt and mousepad for larger runs.
Now, my FAVORITE way to print short sleeves is with the Tag Along™ HP platen. If you’re familiar with our channel here, you’ll know how much I love this platen. Not only is it awesome for printing the front of the shirt and the inside tag at the same time (which saves so much time and allows you to easily brand your t-shirts as a value add to your customers, or a spot for you to put your own branding) BUT, it also just helps you align your shirt on the platen perfectly every time with the patented neck and shoulder shape, still saving you time when printing larger runs. If you thought that was cool, well, what if I told you it works great to print short sleeves, too?
Here, just using the fold or crease that’s centered on the sleeve out of the box, you can align the short sleeve by just reaching underneath and using the tag portion of the platen to loop our sleeve onto. This is just so quick and easy, and one of the many reasons that this multi purpose platen is a must for anyone with a Hotronix press.
Once set here, we dont have to adjust our pressure or press setup and with these Goof Proof screen printed transfers. They print in just 4 seconds, so bam, we’re already done and have a great, perfectly placed and printed sleeve print. The only downside here is if you’re doing larger sleeve prints, as this limits the print area to 3.25 x 3.25 inches.
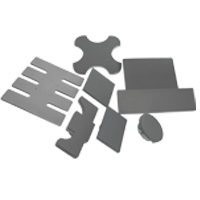
If we’re talking about the interchangeable platens, of course we have to mention the leg and sleeve platen. Offering a 5 and a quarter inch by 20 inch print area, it sure makes printing sleeves easy. However, because of the base of the Auto Clam we have here, it doesn't allow for full sleeve loading with long sleeve shirts. You’ll need a Hotronix Fusion style press or the double leg and sleeve platen. But for our short sleeves, we can make it work here. We’ll talk more about this platen in a little bit when we cover long sleeves.
Now another way you can print sleeves almost as easily, is with a cap press. Just fire up your hat press, here we have the 360 IQ, but any hat press will do. Just be sure to match the application instructions to the transfer type you’re printing, open up the sleeve and place just the outside layer of fabric over the lower platen and press- avoiding that seam on the inside. Nice and easy.
With our short sleeves printed, it’s time to cover long sleeves. One of the easiest ways to print on the sleeves here is using our regular platen and cheating a little bit. We’ll use the folds and seams to place our full sleeve down here on our press. Because we have so much fabric hanging off the platen, we can remove the quick slip pad protector to help grip our sleeve here better. Instead of printing directly on the outside of the sleeve, we can easily print right up next to the outside edge on the front. By aligning a few inches up from the cuff seam, we are set in our placement. Now we press. As you can see, when worn, it actually looks great- not too far on the front and even a little more visible than when directly on the side.
For when you want to print exactly centered on the outside of the sleeve, or for those floating logo prints on the bicep, you’ll need the leg and sleeve platen. Like I mentioned earlier in the video, it’s not fully threadable because of the wide base of the Auto Clam- but if you have a Fusion IQ, Air Fusion or Dual Air Fusion heat press, the goose neck design for the quick change platen makes it easy to thread the entire sleeve on the platen, aligning the center with the crease that's right here in the garment already. I didn’t mention it earlier, but it's wise to spot check and be sure this crease or fold line is centered with the shoulder seams, sometimes it can vary and then it’s throwing your print placement completely off.
Now that's it! All of the ways you can print sleeves both short and long with your heat press. I hope you’re more confident than ever with your decorating capabilities to elevate your own brand or offer some additional print locations to your customers.
Be sure to subscribe to the Transfer Express YouTube channel to stay up to date on all of the helpful educational, instructional and inspirational videos we’re posting every week.
Until next time, I'm Dave, happy pressing!

