Inside Tag Printing with A Cricut EasyPress Mini | Application & Wash Test Results
Browse Video Categories
Transfer Application | Artwork & Apparel | Easy View Tutorials | Webinars | Ordering Tips | Business | Heat Presses
Hey friends, Dave here with Transfer Express and today we are talking about inside tag printing... but with a slight twist!
So in the past year or so we've been seeing the use of these hand-held Cricut EasyPress Mini's just skyrocket in terms of popularity.
Well... we have waited long enough and it's time we give it a shot ourselves and we're going to see how well we can apply our Goof Proof screen printed transfers as those inside tag prints.
We're going to compare some of the different techniques that we've seen on social media like TikTok and how it compares when we are applying with a real heat press!
To top it all off, we're even going to do some wash testing to see if they'll hold up to the 50 plus wash dry cycles that we test all of our transfers for. So are you ready for some fun science experiments today? I can't wait so let's get to it!
First things first, let's pop this EasyPress out of the box. We picked up the name brand on Amazon here but there's tons of alternative options available, too. It boasts it's easy to use with three heat settings, a comfortable grip handle, auto off feature, and it even comes with a little safety base so that you don't burn your table while it's heating up.
First, we're going to plug it in and let it start heating up.
Since it only has three heat settings, low, medium, and high, and not a digital temperature readout that we're used to on our heat presses, we went looking for which setting to use for our Goof Proof and found that the low sets the heat around 290 degrees, the medium around 350 degrees, and the high heat clocking in around 360 to 400 degrees.
Since we'll be printing Goof Proof screen printed transfers today on a 100% cotton shirt, we're going to opt for the high heat for that 365 degree temperature that's noted on the Goof Proof application instructions.
We've also got our handy temperature gun right here so we're going to test and see what our high heat setting looks like and we are a little bit under what it says it is at 341 degrees on this thing. So maybe it's going to heat up a little bit more, maybe it's not, but we're going to apply all the same.
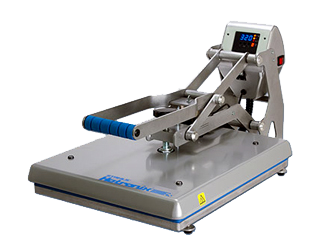
Now, let's start printing as a control for our experiment. Here, we're going to apply our first tag with our Hotronix 16x20 Auto Open Clamshell press. We are set to 365 degrees, a four second press
Time, and medium to firm pressure. We'll pre-press the garment to remove any moisture in the fabric then lay our transfer down and press with a hot peel.
When the press opens we're going to peel the carrier away in a smooth motion immediately and it looks great.
As we mentioned here with the first application, there are three elements to a successful heat transfer – time, temperature, and pressure. The Easypress Mini here only has a temperature setting, so the time and pressure is completely up to us. We're going to try this Easypress in a few different ways, just like we've seen on the internet. Our first method here will press right onto the table - a quick tack at first then a nice little swirling motion, not putting too much pressure on the print, which seems to be what we see most often, for about four seconds.
Next we're going to do the same exact thing that we did last time, just this time we're going to be preheating the garment first and then ironing on the transfer with a slightly firmer pressure for just a little bit longer, here, at six seconds.
For our next application, we'll introduce a mouse pad under our print area which may help with our pressure by offering a base with a little bit of firm give to it. We'll also preheat our shirt here before pressing the same movement, same time, and a hot peel.
Now, we'll also pre-press our shirt here in this test and increase our time because the iron wasn't up to the temperature of what we thought it was. So we'll bump our time out to 10 to 12 seconds, the same movement, same hot peel.
Next up is our wash test. Since all of these transfers appear to have applied, this is where we're going to see which application is the best. We're going to toss these in the washer and dryer for just a few cycles and see how our transfers are holding up, so we'll be right back.
Two days later and we are back!
A couple days later and a couple wash cycles and we have our freshly laundered shirt. We threw it through the washer and dryer two times with a little bit of, you know, ringing and wearing simulation up to it, but these Goof Proof transfers here on this shirt held up pretty good. I'm going to say that all of us were surprised, but let's take a closer look at how and why these made it through the wash, or in some cases, didn't.
Alright, so now that we are up close, let's bring our guide back in so we remember what these are.
Now this one you may have not seen on the shirt before we washed it and we actually did this for a TikTok video, so if you don't already follow us on TikTok, go over to TikTok because we're doing a lot of cool stuff.
That's actually where we first saw people applying these with an Easypress was on TikTok.
But let's go down the entire list here and talk about the ones that we did here specifically for this video.
First is the Auto Clam. The Auto Clam, still nice high opacity looks exactly the same as when it came off the press. It washed and wore fantastic and I have no doubts that this is going to last perfectly on the garment for 50 washes or more, exactly what we tested for.
Let's go on over here. So this is the quick first press with the Cricut Easypress and as you can see, through the wash we lost a whole bunch of letters, at least the end of the lines, the end of almost these two s's, and you can see they're already still lifting up. It's a little bit more tacky and it's just not as quality of a transfer as what we expect with our screen printed Goof Proof transfers.
Now this was a little bit longer but still on the table. You could see that we lost quite a bit of the line, almost more than this one did, and the s, and also still has a pretty good tack to it as well, not nearly as tacky as this one but a little bit more into the fibers with that six second table press.
Now these two over here that we pressed with the mouse pad, you could see that the ink is fully into the garment. That's what we're going to get with a pre-press that's removing any moisture so the inks are not sitting on top of the fabric but sitting more into the fabric. It's not peeling, not tacky anywhere, So that's giving it that 10 second press with that firm pressure.
The same here with number five. A very similar feel to this one, but this one you can't feel the inks barely at all. So that was not moving at all. A nice sturdy strong pressure against that mouse pad that gave us a good surface to print on. You are going to have to expect that that little mini Easypress will be cooling down as you can see the opacity of the inks just differs as we did that in real time.
But if you look back up here to the inside tag where we turned everything off and came back an hour later to print one, it was nice and hot and a nice opaque white ink.
Overall, we're fairly impressed with the quality of how they stuck on there. I hope this shed some light on this very popular application technique applying our custom screen printed transfers with one of the mini Easypresses.
Now it is okay for inside tag prints like the one that we did for the TikTok. It actually really surprised us with how well it did it and apply and stay on the shirt after some wash and dry cycles.
Now, would we recommend using the Easypress to apply any graphics on the outside of a shirt, like a left chest, a center chest, or a sleeve graphic? Absolutely not.
But for an inside tag, the minimal lifting and the inconsistent results may be perfectly acceptable and passable for your brand for something that's only seen by the wearer or owner of the t-shirt.
Of course, using a real deal heat press is going to always give you the absolute best results, just like our wash test showed you. But if you are using one of these handheld heat presses, let us know if you've had similar results or any tips and tricks that you've been using to get results better than ours.
As always, we're happy to help anybody, anyway, in the apparel decorating community.
If you need to reach out to us for any reason at all, you could always call or email us.
But until next time, I'm Dave, happy pressing!


